Navigation Bar

Tuesday, March 27, 2012

My Lil' Chicadee - Krafty Girls and Peachy Keen Challenges

Happy Tuesday my treasured friends!

I have been swamped with group projects, and now I'm heading into exam time, but it was really nice sitting down this past weekend and working on a crafty project! This is really how I celebrate my down time and it definitely helps me relax. If only I had more time to craft and blog - oh, the life of a student.

Moving on to a higher note, this week we're back with another Krafty Girls' Challenge! This week's challenge is to create an Easter project. Since I just received my Peachy Keen Dies in the mail, I was DYING to play with them!! I got perfect spring dies - the Potted Flower and Shower Peepers. These were perfect for the challenge, and keeping this week's Peachy Keen Challenge - Faux Stitching in mind, I created an 8 x 8 Easter/Spring layout.


Isn't the lil' chicadee just too adorable?? I added the eggs from another Peachy Keen Die - the egg and duck die. The sentiment suited my layout just perfectly!

Here's a close-up of my adorable peachies!!


Trail of Treasures: 

  • Layout Base - 8 x 8" cut in white cardstock, stitching done in blue
  • Layer - cut at 7 x 7" from the DCWV Nana's Nursery Boy Stack, punched at the top with the Martha Stewart Daisy Border Punch and added pearls to the centers of the flowers
  • Photo Layers - chocolate layer cut at 6.5 x 4.5", layer cut from Recollections All Year 180  Sheet Stack, stitched around the edge with Sukura Gelly Roll Pen
  • Grass - cut a strip of 8 x 1.5" in green and used the Fiskars Grass Punch
  • Chick - chick cut from the Peachy Keen Shower Peepers Die and the egg is from the Peachy Keen Duck and Egg Die, egg is distressed with Tim Holtz Broken China Distress Ink
  • Potted Flowers - cut from the Peachy Keen Potted Flower Die, pots are distressed with Tim Holtz Vintage Photo Distress Ink, and stitched around the petals
  • Sentiment - from My Creative Time's Color Me Happy Set, oval from My Creative Time's Stitched Oval Die, and attached with Blue Berry Trendy Twine


Until next time's treasures,
Tracey xox

Monday, March 12, 2012

Get Growin - Krafty Girls Challenge

Hello my treasured friends!

It's been a crazy week for me here with group projects and all! I hope you all enjoyed your weekend! As many of you know, my Gypsy is sick, and Provocraft still doesn't know what's wrong with her! My Cuttlebug has now become my new best friend, haha! This week over at Krafty Girls, we're creating our own flowers for a card, scrapbook layout, 3D item, or home decor piece. I decided to do something different, and outside of the "papercrafting" realm - I was inspired by Lauren over at Lauren's Creative to make a wreath. She made this adorable Valentine's wreath which you can see here! I decided to make a spring wreath and decided to start off a lot smaller. It turned out so adorable so I definitely will have to invest in more flower dies in the future! It's gonna be a long post today - I've included a picture tutorial on how to create the mini flowers!


Here's a picture of the supplies I used for this wreath:


Instead of a straw wreath, I used a twig wreath - neither of these wreaths at Michaels had plastic coverings - that way it's a lot easier to wrap the yarn! I'll have to check Joann's the next time I head down to the States - gotta get my passport renewed! The butterflies and bud pieces I picked up from my local dollar stores and I decided to use some blue tulle instead of the purple one. All the flowers out of felt - those rolled teal and raspberry flowers I used this tutorial. For the light pink and white blossoms, this is what I did using My Creative Time's Scallop & Stitched Circle Die - just another way you can use her fabulous die! :)
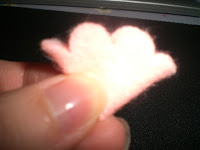
  • Firstly, use your Cuttlebug or any other die cutting machine to cut out the scallop shape in felt.
  • Fold the scallop in half.
  • Fold the scallop in half again. 
  • Staple or use your hot glue gun to glue it in place. Voila! Another idea is to attach a bunch of these small "blossoms" into a bigger flower.  

Here's a few close up pics of the wreath all put together!


Super adorable ain't it?! I love how it turned out, and I'll definitely be making larger ones with plenty more flowers in the future! I'll be linking this up to Pink Cricut's Link-Up Party, and entering it into Paper Playtime's Die Cuts with Flowers challenge. Make sure to head on over to the Krafty Girls Blog to see what the other designers came up with and to join in on the fun! Can't wait to see what you guys come up with!

Until next time's treasures,
Tracey xox

Saturday, March 3, 2012

MCT Throwback Thursday Challenge: My Hunny Bunny

Hello my treasured friends!

I hope your weekend has been off to a great start! I actually wanted to have this layout done by yesterday, but of course, things never go as planned, lol. I was SO excited to see that Emma over at My Creative Time is having a Cricut-less challenge! I usually dread these challenges, but since my Gypsy has been sick for so long, I have gotten by with creating cricut-less projects, or using the Cricut as minimal as possible. Make sure to join in on the fun to have a chance at winner her entire stamp release!!

I'm super behind with my scrapbooking, so my goal is to make scrapbook pages for challenges wherever possible, haha. So here's what I created using only my Cuttlebug and punches for last year's Easter.


And another view:


And here's a close-up of the adorable peachy bunnies!!


Trail of Treasures:

  • Base - 8 x 8" layout, patterned spring paper from DCWV Spring Stack
  • Layer One - 6.75 x 6.75" cut in brown cardstock, used the Martha Stewart Double Loops Around the Page Punch
  • Layer Two - 6.5 x 6.5" patterned paper from DCWV Flower Shower Stack, added strip of 6.5 x 3" creme cardstock punched with Martha Stewart Picket Fence Punch, and 6.5 x 1.5" green strip punched with Fiskars Grass Punch, added flowers with Michael's small flower punch (pearls placed in the center) - all distressed with Tim Holtz Vintage Photo Distressing Ink
  • Bunnies - Peachy Keen Bunny Die, boy bunny face from PK-440 Cute and Cuddly Face Assortment
  • Twine - Blue Berry Trendy Twine added to photo
  • Sentiment - from My Creative Time's Color Me Happy stamp set 

I used to call my boyfriend my "hunny bunny" all the time so this set sentiment is perfect! ;) Make sure to join in on this fun challenge here! I'll also be linking this up to My Creative Time's Stamp of the Month Linky Party!

Remember to check out the Krafty Girls Feelin' Lucky challenge here! You can view my post here. Have a fabulous weekend my treasured friends! 

Until next time's treasures,
Tracey xox